We’re continuing our series on setting up WordPress on BlueHost. Today we’ll look at choosing a theme—the visual appearance of your site—and adding cool functionality with plugins. This post is based on WordPress 3.1.3.
Finding a New Theme
When you set up a blog, you want to have a design, color scheme and layout that helps to convey your blog’s theme, genre, purpose and features. There are hundreds of free WordPress themes that can help you do that. Additionally, you may want to commission a custom theme, which can vary in price from $25 to $1000 and more. You can learn more about working with a blog designer or going it alone in our blog design series.
Things to keep in mind as you select your theme:
- How many columns do you want? Traditionally, most blogs have 2 or 3 columns, with the column displaying your posts much wider and the other one or two narrower columns featuring navigation and other information.
- How do you want the columns laid out: posts on the right, left or in between the narrower columns? Some themes let you move around the columns.
- What colors are you looking for? Again, some themes come with several color schemes to choose from.
- What kind of graphics are you looking for—clean lines, rounded edges, etc.?
- Do you want a navigation bar above or below your header (or both)?
- Is the theme easy to read, navigate and understand?
- Does the theme match your blog’s topic?
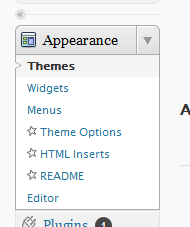
WordPress can help you find free themes for your blog in the Appearance menu, under Themes. At the top, select Install Themes.

On the Install Themes page, you have options to search for a theme. Check the box next to each option you want to search for, then click Find Theme, or you can search by keyword if you know the name of a theme you want to use.

The search will return all the themes that meet your criteria. Here, we checked pink, two columns and right sidebar. The search returned two themes:

To see what the themes look like full size, use the Preview link below the theme. This brings up a popup window with an interactive preview of the theme:

(You can close the preview by clicking the x in the upper left.)
If you like the theme or just want to try it out on your blog, click the Install button below the theme. This brings up another popup window. Click the Install Now button.


This automatically transfers the files of the theme to your website. Once the transfer is complete, you can click the Activate link from the transfer page to turn the theme on for your site. (You can also activate themes from the Appearance page.)
In the Appearance menu, you can see all the themes you’ve uploaded and change your theme. Under Available Themes, you should see the theme you just uploaded. Click on that theme to enable it for your blog. Be sure to check your site to make sure the theme is functioning properly.

Frequently Asked Questions on Themes
- Should I only use a widget-ready theme? Probably. If you’re planning on using a lot of widgets, a widget-ready theme is a useful tool. It is ready for you to customize your sidebars and post layouts using an easy drag-and-drop style interface. But if you’ve got enough confidence and experience to get into the code yourself, you’ll be fine without one.
- What are fixed and fluid width? Fixed width means that no matter what size screen people use to view your website, it will always be the same number of pixels wide. This can be a problem if your blog layout is designed to be wider than most standard screens (the smallest resolution is 800 pixels wide, but not many people use that resolution anymore. The most popular resolution right now is 1024 pixels wide).
Fluid width means that the blog layout is designed “resize” itself to maintain its proportions no matter how wide the viewer’s screen is. If you have a fluid layout and your posts column takes up 50% of the width of the screen, the posts column will take up 400 pixels on an 800×600 resolution screen and 960 pixels on a 1920×1200. Generally, these are considered more user-friendly, but a fixed width theme will work just fine, too.
- Can I adjust the colors of my theme? If the background of your theme is an image, you should edit the image on your computer. If the colors are set via CSS, you can edit the CSS file before or after installing your new theme. Many themes now come with options pages that let you use a custom header image and/or colors.
Installing Plugins
Plugins are bits of code designed to customize and enhance your WordPress installation. Plugins can be installed in the same way that themes are, using the WordPress internal installer to find and install plugins.
You’ll find plugins in thee second set of left-hand menus of WordPress, under Plugins (if there’s a red circle with a number in it, that means you have that many plugins to update.) When you find a plugin that you’d like to implement in your blog, you can use the installer to find and automatically install it. The installer is at the bottom of the Plugins menu page, or you can click on “Add New” under the Plugins drop down menu.
From the Install Plugins window, you can search the WordPress plugin directory for your plugins.

Enter a term in the Search box to find a plugin, or navigate using the tags. Here we’re searching for a search plugin. This takes us to the results page, where the results look like this:

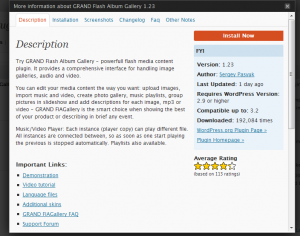
Details below the name generates a popup window with more info about the plugin—what it does, how popular it is, whether it’s compatible with your version of WordPress, etc.
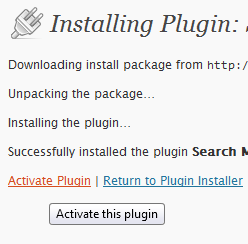
Select the plugin you want and click on Install below the name. WordPress automatically installs the plugin.
Once the plugin is installed, if you want to use it right away, click Activate this plugin.
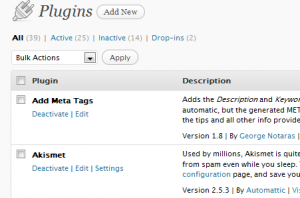
To work with your plugins later, go to the Plugins menu. You will see a list of all your uploaded plugins. The default WordPress install comes with two plugins: Akismet, a plugin to block spam comments, and Hello Dolly, a plugin to display lines from the song “Hello Dolly” in your WordPress admin screens. Once you’ve added your other plugins, these should also appear here. You can click the Activate link to activate each plugin individually, or you can use the checkboxes to activate, deactivate or delete more than one plugin at a time.
Note: WordPress will always deactivate all plugins before updating a WordPress installation.
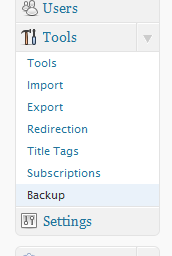
Many plugins add menus to your WordPress so you can configure the options in them. Different plugins integrate into WordPress in different ways. The most common method seems to be for the plugin to add a submenu under the Tools or Settings menu. A few plugins add submenus to the Plugins or Dashboard menus; fewer still add another box to the left-hand menu bar all to themselves.

Some plugins don’t have menus in this way. Some plugins don’t have configurable options at all. Other plugins require you to edit the text of the plugin itself to configure the options (these are getting more and more rare). Study any documentation (the plugin author’s website or a readme file) to find these. Sometimes an explanation is included in the description of the plugin.
If you need to edit the plugin file itself which you should almost never have to do, you can do so by going to Plugins>Editor. The plugin files you have uploaded (active and inactive) will appear in a list on the right-hand side of the screen. Select the plugin you want to edit and follow its instructions. Be sure to save your changes. WordPress recommends deactivating a plugin before editing it and never editing an active plugin.
Most plugins come “widgetized,” packaged with drag-and-drop widgets to place in your blog layout so you don’t have to mess with the code, but rarely, some plugins will require you to insert a bit of code into your blog template to get them to work. To edit your theme’s files, in WordPress go to Appearance>Editor. There will be a list of files in your theme on the right-hand side of the screen. Select the appropriate file and follow the plugin’s directions carefully.
Note that it can be easy to “break” your blog (or a specific plugin) by editing its code. I recommend setting up a test blog on a subdomain to practice with these plugins to make sure that your blog will still function./p>
Ready to take the plunge? Sign up for hosting with BlueHost and set up your WordPress blog today!


