Categories
MetaBlogging

WordPress on Bluehost: the Post page in depth

This entry is part 3 of 5 in the series Set up WordPress on BlueHost

Last time we covered how to make posts and pages. This time we’ll look at a few more features of the Add New Post or Edit Post page.

Posts are the basic unit of a blog. They are not to be confused with Pages, however. Pages are usually where you place special “timeless” information such as your About page, your Contact page, etc. Your posts are generally for chronological or “regular” blog entries.

To write a post, go to Post>Add New, or click on the New Post button on the top bar. The top text box below “Add New Post” sets the post title, which appears at the top of the post. If you don’t set a post title, it will be published without a title. Once you input a title and WordPress autosaves (or you click the Save Draft button), a field appears below the title box with the URL the post will have, including the “slug”: the URL name for this post (highlighted in yellow).


If you don’t give the post a title before you save the draft (or WordPress autosaves one), WordPress assigns the post a number. Every post in your WordPress blog has a number, of course. Saving a draft of the post with a title will replace the slug.

If you’d like to change the slug yourself—to make it easier to remember, shorter, or more friendly to search engines—click on the Edit button. The slug portion of the URL turns into a text field. Be sure to save your changes.

Below the title box is the post box. In the box, you type the content for the post. At the top of the box are the buttons to upload media: image, video, audio, or other media (we’ll talk more about adding pictures and media next time).

Most of the buttons above the post window are fairly intuitive. From left to right, they are:

  • Bold
  • Italicize
  • Strike through (a popular convention in blogging)
  • Bulleted list
  • Numbered list
  • Blockquote (indents text; also may add some styling depending on your theme)
  • Align left
  • Align center
  • Align right
  • Create link (only an option if you have selected text)
  • Unlink (only an option if you have selected linked text)
  • Split post with More tag (creating a Read more. . . link on your blog homepage and feed)
  • Spellcheck (with pull down for languages)
  • Toggle fullscreen mode (makes the post box take up the whole browser window)
  • Show or hide advanced toolbar (“Kitchen Sink” they call it):

Clicking on the last button adds a second toolbar below the first.

The advanced toolbar buttons, from left to right, are:

  • Preset formatting styles (drop down menu)
  • Underline
  • Align full (justified)
  • Select text color
  • Paste as plain text
  • Paste from Microsoft Word
  • Remove formatting
  • Insert/edit embedded media
  • Insert a custom or special character (letters with accents, etc.)
  • Unindent (only an option if the paragraph you’re editing is indented)
  • Indent
  • Undo
  • Redo
  • Help

Other capabilities on the New Post page:

  • Drag and drop the individual boxes to customize the page so you can find all the things you use commonly. Just click on the title bar of a box and hold to drag.
  • Toggle each box open or closed for clutter/cleanliness. Just click the down triangle on the title bar of the box (shown at right, it appears when you hover over the box).
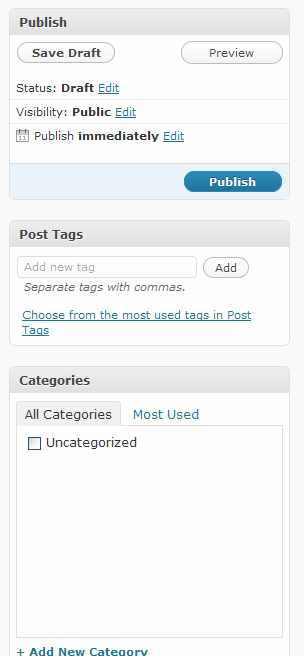
  • Assign a post a category—be sure to check the box beside the category name in the Categories box at the right, below the Publish (this may also be below the Tags box). (If this box is ‘closed,’ click the triangle at the end of the box to ‘open’ it.)

  • Add a new category—click +Add New Category. (See also Creating Categories.)
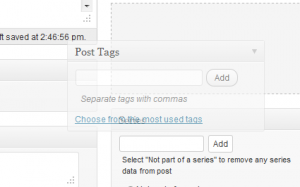
  • Add tags to a post (topics addressed in a post which are not as central or important to your blog as topics covered in categories)–use the Tags box. This is on the right side below the Publish box. After typing the tags, click Add. To remove tags, click the x next to the tag.
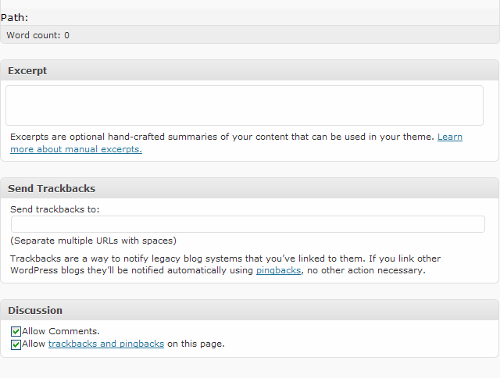
  • Disable comments and/or pings (links back from other blogs that link to your post)—use the options in the Discussion box in the main column.
  • Select a different author for a post—use the Author box. (If this box is ‘closed,’ click the + sign by the title of the box to ‘open’ it.)
  • Set an optional excerpt—type a short summary or cut-and-paste a section of your post into the (Optional) Excerpt box. This is included in the code of your page and may be used by search engines to display info about the page on the search engine results page.
  • Send a trackback (a comment-like notification to another blog post that your post includes a link to it)—put the URL of the linked post in the Send Trackbacks box. However, WordPress can also be set to automatically send trackbacks to any link included in your post by checking the first option under Settings>Discussion which reads “Attempt to notify any blogs linked to from the article (slows down posting.).”
Categories
MetaBlogging

Beginners’ Guide to WordPress: Posts & Pages

This entry is part 2 of 2 in the series Beginning with WordPress

We’re continuing our series on getting started with blogging, bouncing back to WordPress this week to look at the basics of posting and creating pages.

Previously, we looked at how to create your first post—but there’s a lot of information and options on the post page that we didn’t cover. To get to the edit post or add new post page, you can use your dashboard or the gray bar at the top of your screen when you’re logged in to WordPress. The Posts menu is on the left-hand side:

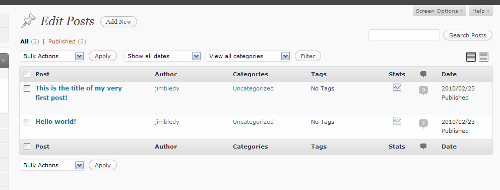
The Edit option takes you to a list of your posts (click to enlarge):

Here, the posts you’ve saved as drafts, published or scheduled on your blog are listed in chronological order. You can click on a post title to edit it individually. When you hover your cursor over the title of the post, you get additional options below the title: Edit (which does the same thing as clicking on the post title), Quick Edit (which lets you change things like tags, categories, title, and date right in the Edit Posts page), Trash (which moves the post to your trash, where you can salvage it later if you want), or View (to see what it would or does look like on your blog).

On the same line as each post title, you can also click on the author name to only show posts by a certain author, or the category name to narrow your view to posts in that category. Each post’s viewing stats and comments are also accessible from here.

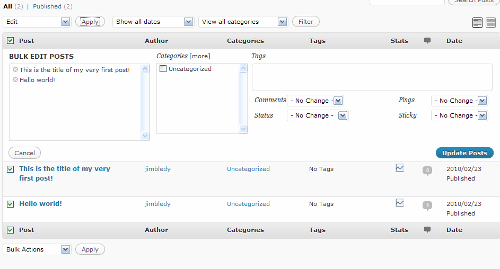
You can also edit multiple posts from this screen. Check the boxes next to the posts you want to edit and use the drop down menu labeled Bulk Actions to edit or delete multiple posts. This is waht it looks like when you choose to edit multiple posts (again, click to enlarge):

This way, you can change multiple posts into different categories, add tags to multiple posts and change whether they can have comments or are even published—many of the same things you can do for a single post in Quick Edit.

The next option on the Posts menu is Add New. (You can also add a new post by clicking on the New Post button on the top gray menu bar.) We looked at how to create and publish a post last time; this time we’ll look at the rest of the post options on this page.

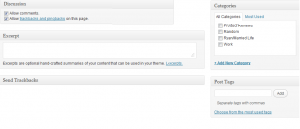
Below the post text box, there are three boxes for more information: Excerpt, Send Trackbacks, and Discussion. For the most part, these are pretty self-explanatory—especially since they include an explanation 😉 .

To the right of the post box, there are three more boxes with options: Publish, Post Tags and Categories:

The Publish box has the Save Draft, Preview and Publish buttons. (Once you’ve published a post, these buttons are replaced with a Preview Changes button up top and an Update button on the bottom).

This box also has more options: You can click Edit by Draft to change the status from Draft to Pending Review (for drafts you’ve completed but aren’t ready to schedule). Once you’ve published, Published is added to this option list. Clicking Edit next to Visibility allows you to set a post as public, private or password-protected (by a password you set). Also under this option, you can set a post to always remain on the front page of your blog, such as a short post describing your blog or perhaps inviting visitors to introduce themselves.

The Post Tags box is used to add tags to a post. These are usually listed on your post and can let your users see all your posts on a particular, narrow topic. Tags are generally more specific than categories (the next box down): if you blog about knitting, for example, you might have a category for all your Projects, but tags for Finished Objects, Sweaters, Cardigans, etc. When adding tags, be sure to hit the Add button (or the Enter/Return key) AND save the post/draft to save them. (You can remove a tag by clicking the x next to it.)

The Categories box lets you categorize your posts by the broader topics of your blog. You can also add a new category from right inside this box—just click +Add New Category and you’ll get a text box to name your new category.

Note that the Add New Post page can be customized: you can drag and drop all six of these boxes to rearrange the page however you’d like.

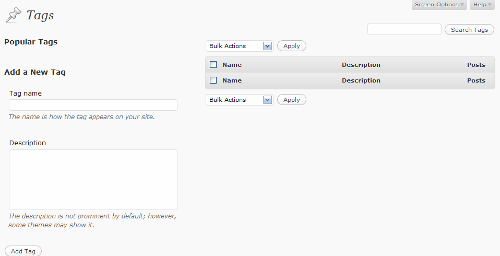
Also on the Posts menu are pages to manage all your tags and categories. The Manage Tags page (click to enlarge):

From here, you can add new tags, as well as edit the descriptions of existing tags. Once you’ve published posts with tags, your most used tags appear under Popular Tags. Also, an alphabetical list of the tags, their descriptions and the number of posts using those tags will appear to the right. As with posts, you can use the check boxes to select multiple tags to delete, or you can edit individual tags (such as to add a description) by clicking on the tag’s name. Clicking on the number of posts using them gives you a list of posts (on the Edit Posts page) using that tag.

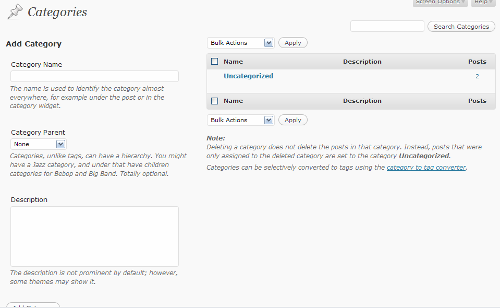
The Categories page is very similar (click to enlarge):

The most notable difference here is that “categories, unlike tags, can have a hierarchy.” Tags are all one level, but Categories can be “parents” or “children”—you can have one category broken up into multiple subcategories. With our knitting blog example, maybe under the Projects category, you have three subcategories: Cardigans, Pullovers and Socks.

(Why use subcategories instead of tags? If a topic is really central to the purpose of your blog and something you’ll be posting about frequently, but falls under the purview of a broader subject of your blog, a subcategory might be the perfect fit—but only you can decide what should be a tag and what should be a category.)

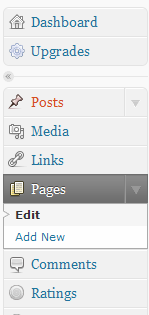
In addition to Posts, you can also have Pages on your blog. Posts are the temporal stuff—the day-to-day news updates, the regular content on your blog. Pages are for important information not tied to time, like your About or Contact pages. The Pages menu is further down on the left-hand side of WordPress:

The two options, Edit and Add New, lead to pages almost identical to the Edit and Add New Posts pages.

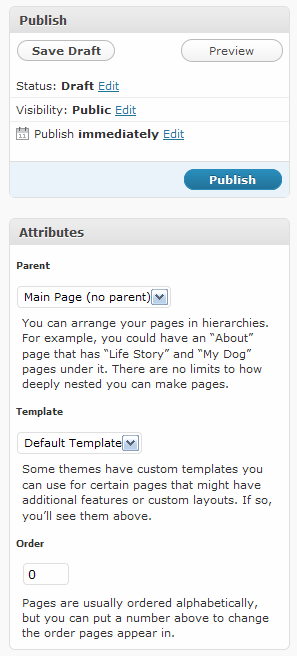
The biggest difference in creating pages is that, like categories, you can have subordinate pages—for example, your About page might have child pages on your Biography, your Portfolio, etc. This is set in the Attributes box below the Publish box on the Edit or Add New Page page:

You can also use a custom template (if you dare) for certain pages—a different layout for a particular page, for example. The page Order determines what order your pages are displayed on your menu bar on your blog. If it’s not set, the pages are listed by date published.

Whew! Everything there is to know about the Posts and Pages menus on WordPress!

Categories
MetaBlogging

Beginning with Blogger: Posts and Pages

This entry is part 2 of 3 in the series Beginning with Blogger
Print This Post Print This Post

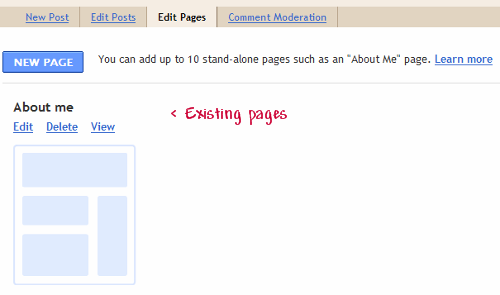
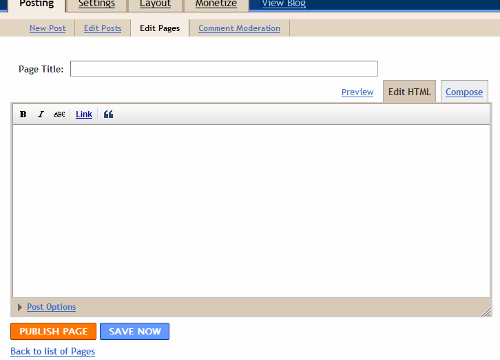
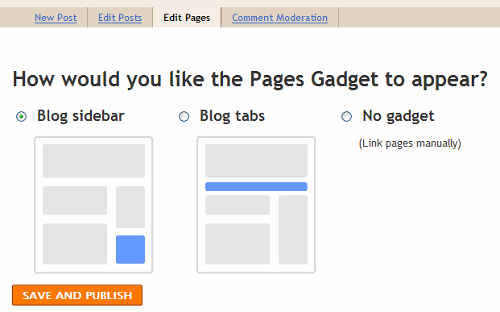
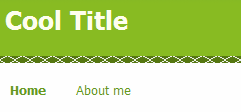
While this post is intended for beginners, there may be something for all of us here. Did you know that Blogger now has “Pages”? This is a very cool, very important step for Blogger as a “full-featured” blogging platform. You don’t have to cobble together a menu bar or touch HTML or flood your feed as you create “About Me” and “Contact” pages. (Check out the fourth picture and description for more details.)

All right, so we’ve created a blog with Blogger and even made our first post. Now we’re ready to learn a little more about posting. When you log in to Blogger and go to your blog, click on the Posting tab. You’ll see you have four sub-options.

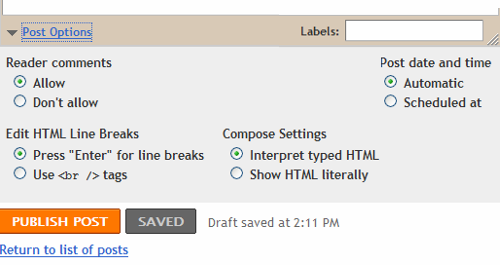
The first, rather obviously, creates a New Post. We already went over how to create a post, so today we’ll look at the Post Options below the post text box. Click on the triangle to open the Post Options:

Here, you can switch off comments on a case-by-case basis. (In a few weeks, we’ll find how to turn off all comments automatically.) Unless you want to code your posts in HTML, keep the Enter HTML Line Breaks set to Press “Enter for Line Breaks. And if you’re not entering any HTML (for example, the code for others to copy and paste to use a badge), don’t worry about the Compose Settings.

The Post Date and Time has two options: Automatic, meaning it sets the date and time of the post to whenever you hit Publish, or Scheduled, meaning you get to pick the date and time displayed on the post. You can pick a time in the past to post-date a post, or you can pick a date or time to schedule a post to go live in the future. (When you click the button by Scheduled, a box pops up for you to enter the date and time you want.)

Finally, note here the Labels. You can use these to assign your posts to categories, and organize them for you and your visitors. You can have many, many Labels on a post, using them as specific “tags” so you can keep track of all the topics you mention, or you can stick to 5-10 or so Labels total, and use them as broad categories to organize your blog into general topics.

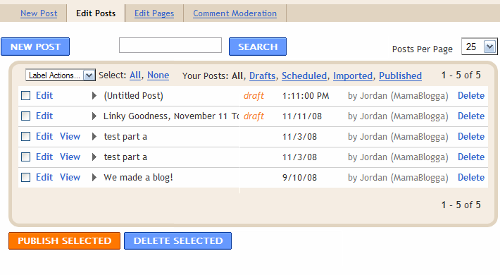
The next option under the Posting Tab is the Edit Posts option. This lists all your posts and drafts—and this is where to go to finish working on a draft post.

You can select some or all of your posts to add labels (with the drop down menu at left). You can also filter the posts you see by when they are or will be published: drafts aren’t scheduled to be published, Scheduled posts have been assigned a date and time and “published,” but aren’t visible on the blog yet, and Imported posts came from another blog (we’ll look at how to do that another week).

Warning: If you are saving draft versions of posts in Blogger, you may be publishing those posts to your RSS feed. When you publish the post later, it may not show up in feed readers again. So if you have a time-sensitive post (or just want to make sure your readers see your post when it’s ready, and only then), try using a test blog to draft, then cut and paste to your main blog. (I can’t find any documentation on this issue from Blogger, but I’ve seen this happen with half a dozen different Blogger blogs.)

On the line with the post, you can see the Title and the date or time (if recent enough) it was either published or last edited. To the left of the title is a little triangle—you can click on the triangle to see the text of the post without leaving this page. If a post has been published, you have the option to View just left of that. And left of that, you click Edit to finish or fix a post.

At the top, you can search in your posts or create a new post. At the bottom, you can publish or delete any of the posts you’ve selected with the check boxes on their lines.

The next option under the Posting Tab is the Edit Pages option. Pages are not like posts. Posts are little bits of time. They have dates and times attached to them. They’re your weekly/daily/whateverly updates. Pages are for the information that’s almost always going to stay the same on your blog: who you are, how to contact you, etc. My pages are displayed in a line underneath my header. (Home, Blog Mentoring, About, Contact, etc.)

You can have the same layout easily with Blogger. (This used to be a lot of work!) Click on Edit Pages to view the page menu. Here, you have the option to create a new page. Below that, any existing pages are displayed. Click on New Page to create a new page.

The Create a New Page page looks just like the create a new post page. Enter your title and text here, and click Publish Page to make it live.

If this is your first Page, Blogger will ask you where you’d like the list of your pages to be displayed on your blog. I highly recommend the Blog tabs option.

When you visit your blog, you can see the Pages listed below the header:

The last option under the Posting tab is Comment Moderation. All this has is a link to the Settings page for Comment Moderation:

And we’ll talk about that with other settings!

There you go—now you can save drafts, create new posts and create pages for your Blogger blog.

Anything need to be clearer?